Install Steps

Guide to install quickly, up and running for use in just a minute or two

Home > Windows Apps > PDF Page Inserter > Installation Guide

NOTE: A PDF version of this installation guide is available for download here.

It typically takes not more a minute to perform the install and configuration. With this guide, you would be able to quickly and easily install and configure AssistMyTeam PDF Page Inserter.

For ‘Per User Installation’ (ideal for standalone single user/workstation)
PdfPageInserterSetup.zip (for both 32-bit and 64-bit Windows)

For ‘Per Machine Installation’ (ideal for installing on Citrix and Terminal Servers)
PdfPageInserterSetup_Citrix.zip (for both 32-bit and 64-bit Windows)
NOTE: Citrix setups are available only to Enterprise License holders

The downloaded zip file contains the setup.exe and other supporting documents. Extract these file contents to a file folder.

Per User Installation and Per Machine Installation

In Per User Installation, the install is performed 100% on the local system. Further, this install is intended to serve only the current logged on user of the system/workstation and will be installed under the user’s application data folder (instead of Programs Files folder) and no elevated permission is required (This is known as per user installation). So, there won’t be a prompt from UAC to allow this install unless you change the install directory to say, Programs Files which will warrant an elevated permission/UAC prompt. If the same system is used by multiple users, each one needs to install the add-in on their profile with the default installation folder location.

Per Machine Installation: If you have the need to have a single install that serves all users of the system (i.e., per machine installation, which technically means the files will be installed under Program files folder and the add-in will be registered under HKEY_LOCAL_MACHINE registry hive rather than HKEY_CURRENT_USER), request the Citrix/Terminal Server version of the setups from us to perform a per machine installation.

Step-by-Step Guide

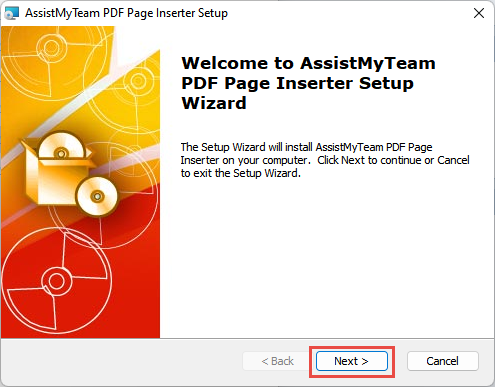
Step 1. Run the PdfPageInserterSetup.exe to start the installation. Click ‘Next‘ to Continue.

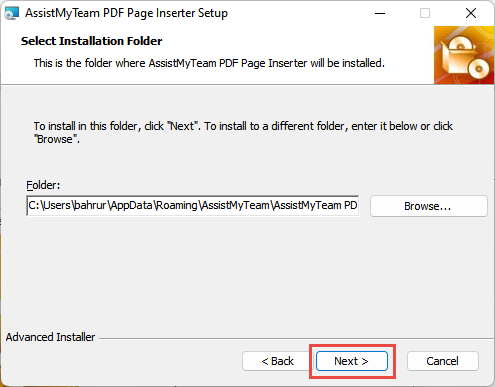
Step 2. Select the appropriate destination folder where the application files will be installed. If you change the default folder path, please make sure you have appropriate permission. (Note: by default, it will be installed under your application data folder)

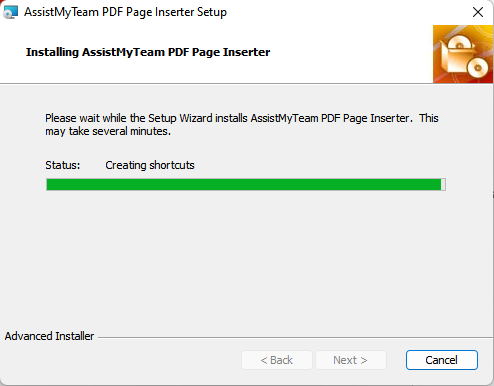
Step 3. Click ‘Next’ to continue with the files extraction. It just takes a few minutes to complete the whole copying process.

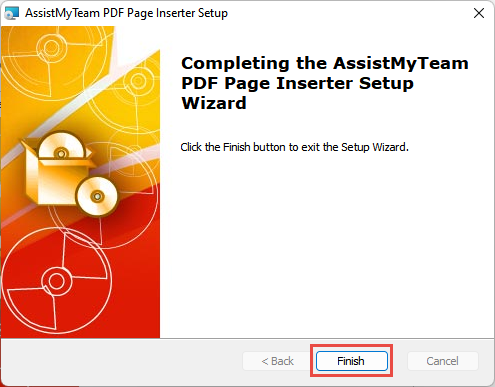
Step 4. Click ‘Finish’. This ends the files installation process in your system.

Now go to Start Menu > All Apps. If the installation was successful, you will see new menu entry ‘AssistMyTeam PDF Page Inserter’.

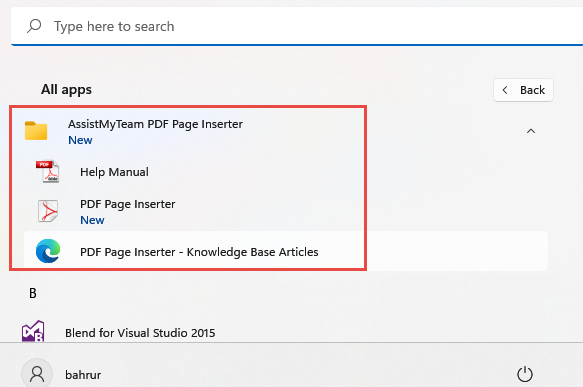
To start the app in Windows, click ‘PDF Page Inserter‘ from the menu under ‘All Apps’. This will load and display the main interface of the converter app.

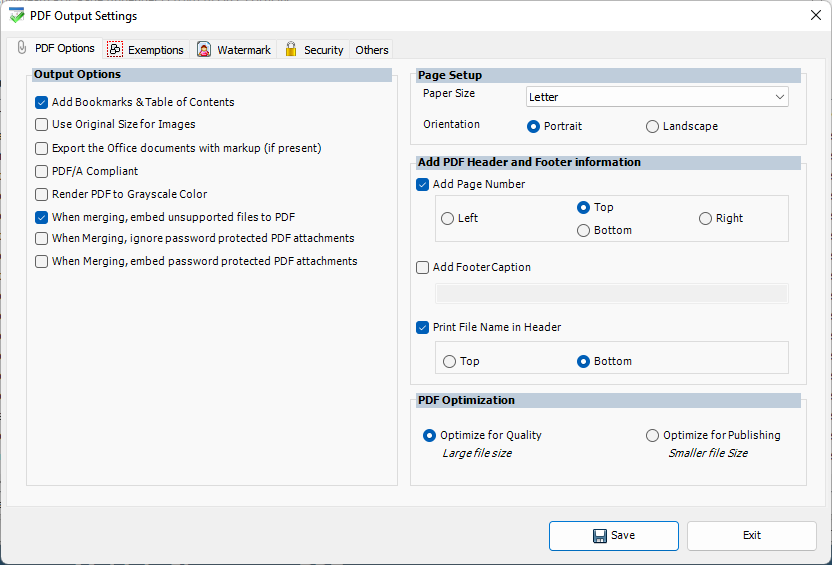
To configure the output settings for PDF, click the ‘Settings’ button. Within the settings dialog, you will find options to tweak and customize the PDF output behavior, set watermark text or logo, set security password to be applied to PDF, modify the page setup, paper size, layout etc.

For more references and help, refer to the PDF Help Manual, which can be invoked from PDF Inserter Converter app > Help > Help Topics.

You can also download the full PDF help manual directly from this link: