Convert a document to PDF using Context Menu
The easiest way to convert a document to PDF is to simply right-click that file in your Windows Explorer, and click ‘Instant .pdf‘ menu. Consequently, the PDF will be generated with the same filename, at the same folder with the extension .pdf.
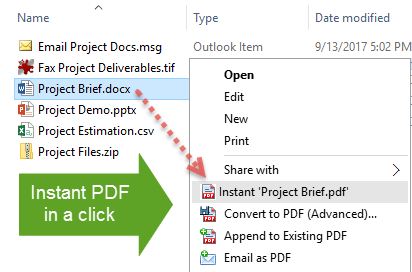
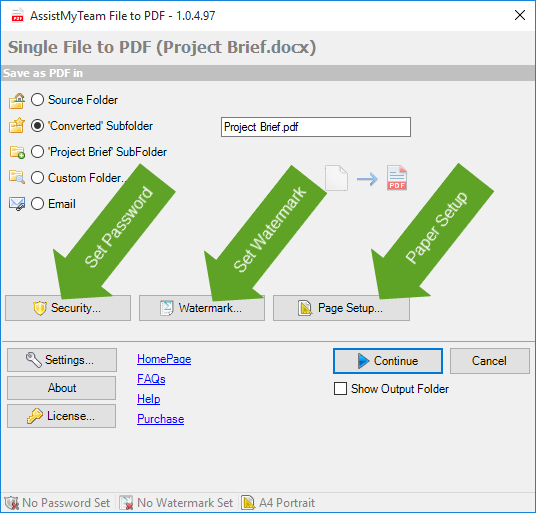
Likewise, if you want finer control over the PDF, click ‘Convert to PDF (Advanced)..‘ menu.
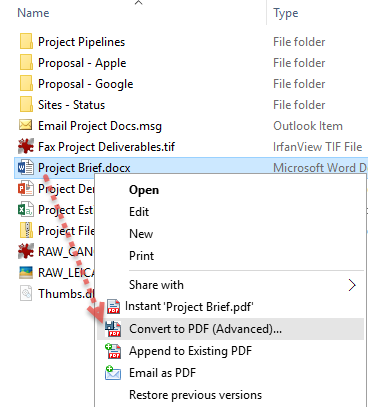
In the advanced mode, you can set user and master passwords, security permissions such as preventing the PDF from being printed, copied or edited etc. In addition, you can specify PDF paper type, orientation or the destination output folder, or apply watermark.
Convert a Zip file to PDF
To quickly convert a Zip file to PDF, right-click that file in your Windows Explorer, and click ‘Instant .pdf‘ menu.
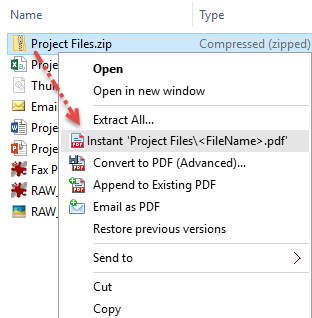
By default, the app will automatically convert each of the document (contained within the ZIP file) to PDF and place it in the same folder as that of the parent ZIP file. However, you can change this preference, to output the converted files to a sub-folder having the same name as that of the parent ZIP file. Furthermore, you can configure to combined all the documents within the ZIP file to one long PDF file.
Likewise, if you want more control over the PDF output, click ‘Convert to PDF (Advanced)..‘ menu.
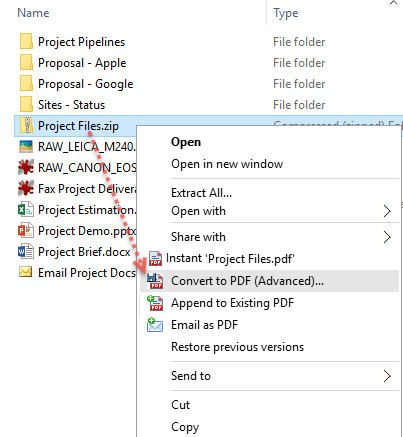
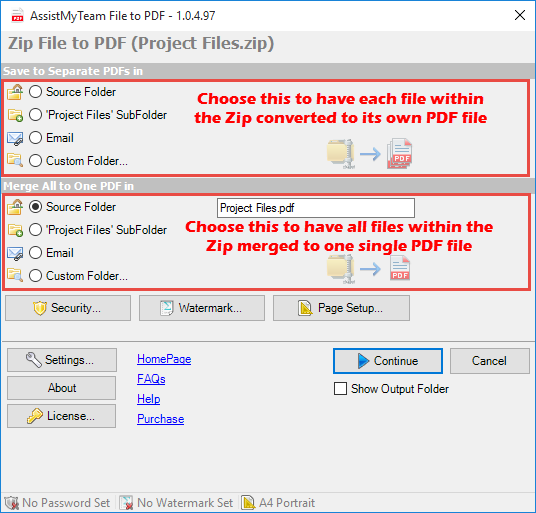
Similarly, in the advanced mode, you can choose the PDF output mode, for all documents inside the ZIP file. For example, convert each file to own PDF, or combine into one, set password and security permissions, page type etc.
Convert a MSG or EML file to PDF
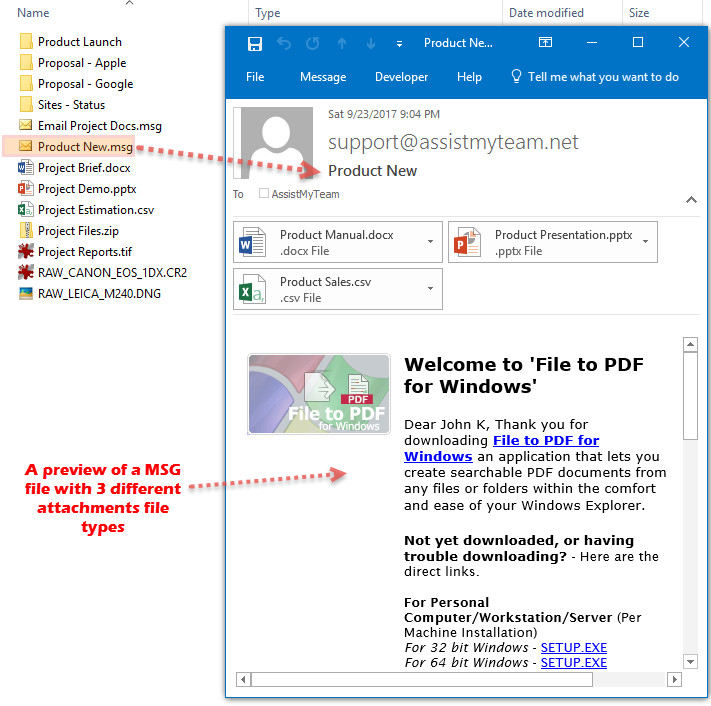
PDF Converter can take MSG or EML files to convert to PDF documents, along with the attachments. In fact, you don’t even need to open the MSG or EML in Microsoft Outlook.
A preview of a MSG file (e.g., Product New.msg as in the screenshot below) with 3 different attachment files – Word, PowerPoint, Excel docs.
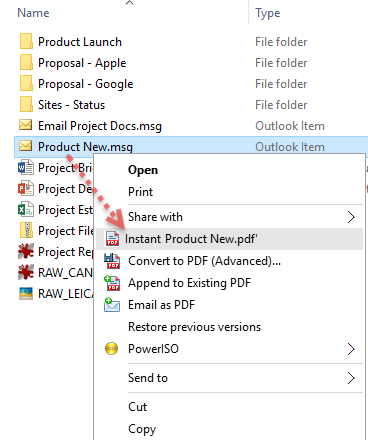
To quickly convert a MSG or EML file to PDF, right-click that file in your Windows Explorer, and click ‘Instant .pdf‘ menu.
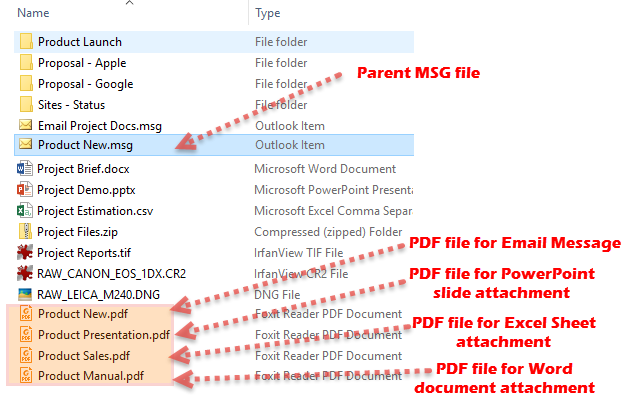
By default, the app will automatically convert the attachments to their own PDF files, apart from the email itself. In effect, you will have one PDF for the email and as many PDF files for that many number of attachments in that email. However, you can change this preference to combine both attachments and email into one PDF.
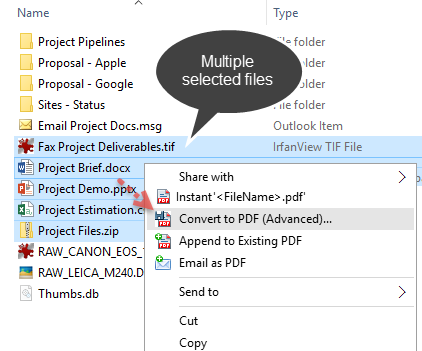
Convert multiple documents to PDFs in batch
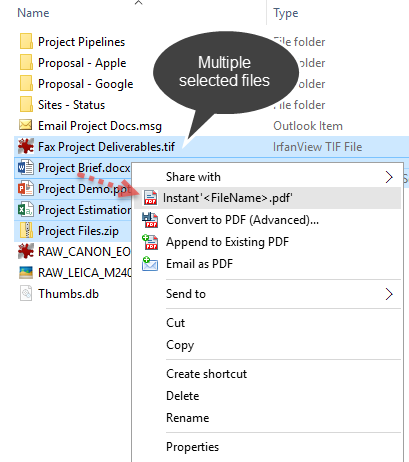
Similarly, right-click multiple selected files in your Windows Explorer, and click ‘Instant .pdf‘ menu. This will convert each of the selected file to its own PDF file in batch.
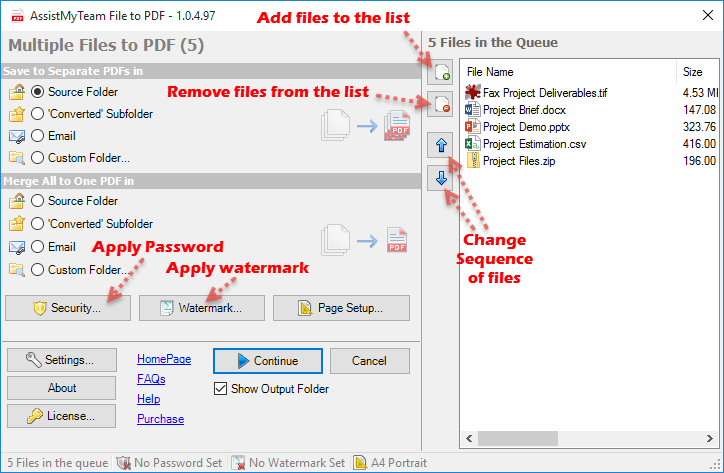
Likewise, if you want more advanced control over the PDF output, click ‘Convert to PDF (Advanced)..‘ menu.
In advanced mode, set passwords and security permissions, page type, orientation, or watermark.
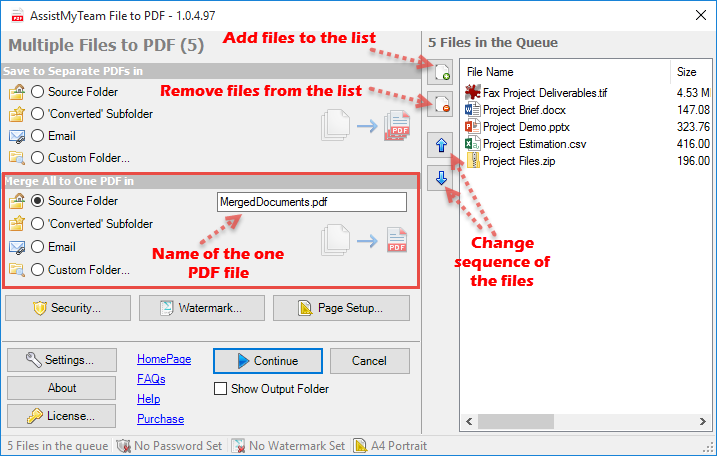
Convert and combine multiple documents to One PDF file
To generate a one PDF file, select multiple files in Windows Explorer. Right-click and click ‘Convert to PDF (Advanced)..‘ menu.
This will take you to the advanced mode window. Within the section ‘Merge All to One PDF in‘, choose one of the destination option and change the one PDF file name if necessary. Default is ‘MergedDocuments.pdf’.
Append documents to an existing PDF file
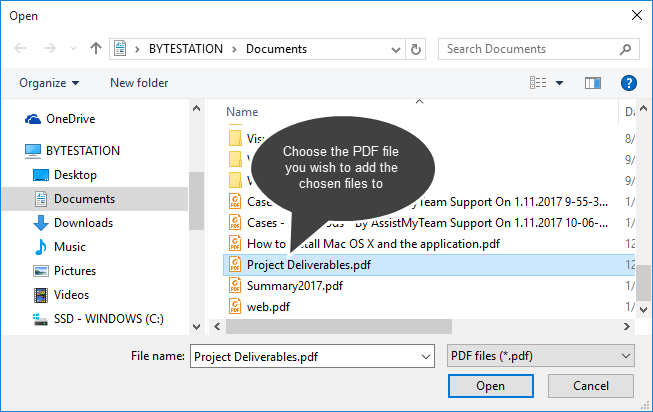
To add or append files to an existing PDF, under Windows Explorer, right-click the files (that you wish to add/append to) and click ‘Append to Existing PDF‘ menu.
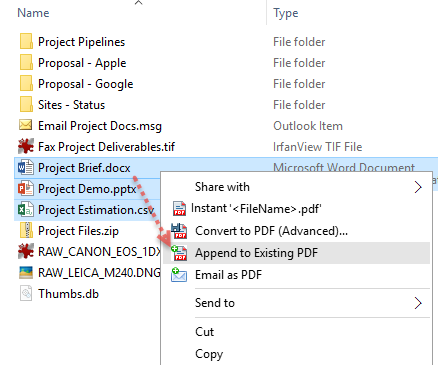
It prompts you to choose an existing PDF file to which the chosen documents will be added to. No matter what file types you have chosen, it will convert them to PDFs before inserting to the chosen PDF file.
Email documents as PDF attachments
To email files as PDF attachments, right-click the files under Windows Explorer and click ‘Email as PDF‘ menu.
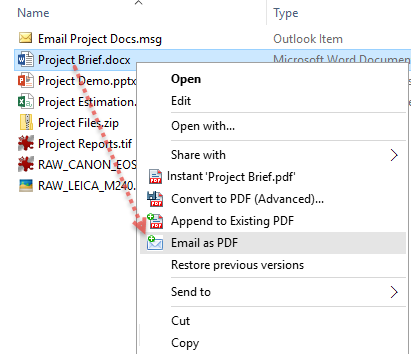
As a result, it will automatically convert the selected files to PDFs before attaching to a new email compose window.

Please note, this feature only works if Microsoft Outlook is installed.
Add Watermark to PDF
Adding watermark is a simple way to secure your PDF content. For one thing, a watermark easily lets viewers identify the status of your PDF content. For instance, as a visual warning to designate your document as confidential or for internal use only. Equally important, it protects your PDF content from being passed off as someone else’s contribution when shared with others. Moreover, adding a watermark of your company logo or brand on publication material not only adds a professional touch, but also helps to identify ownership without completely locking the PDF down.
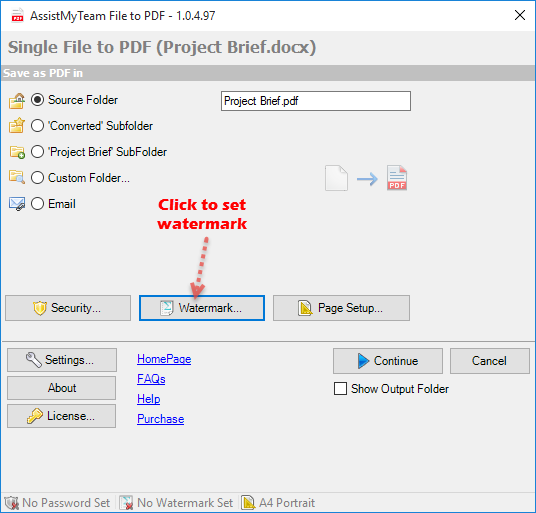
To add a watermark to new PDF file, right-click the source file in Windows Explorer, and click ‘Convert to PDF (Advanced)..‘ menu.
To add a watermark image or text annotation to your PDF files, click the ‘Watermark‘ button. You’ll get the following dialog box where you can choose the type, position of your watermark.
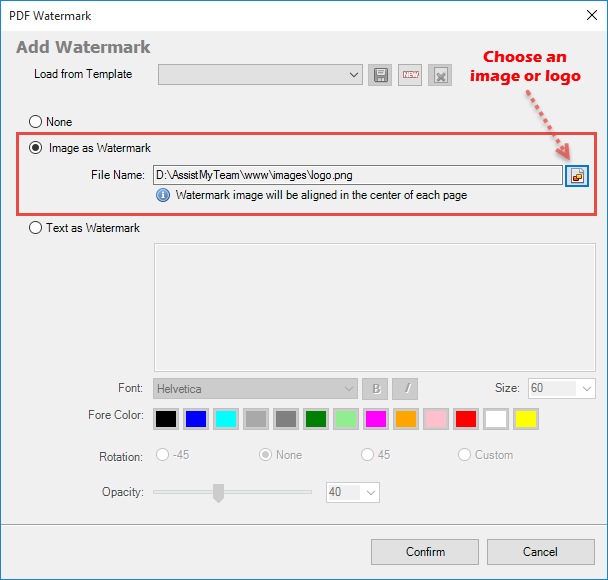
You have two options on how to create a watermark:
Image as watermark
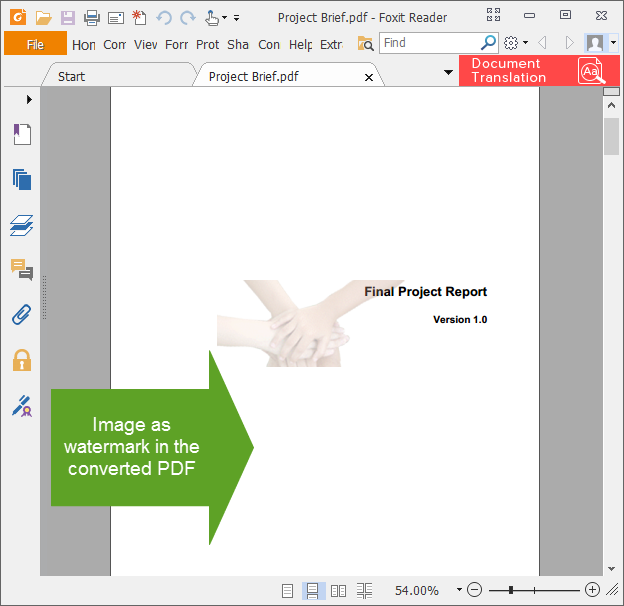
Click on the ‘Image as watermark‘ radio option. To insert an existing image as a watermark, click on the Image button and browse the open dialog box. And select your image from your computer.
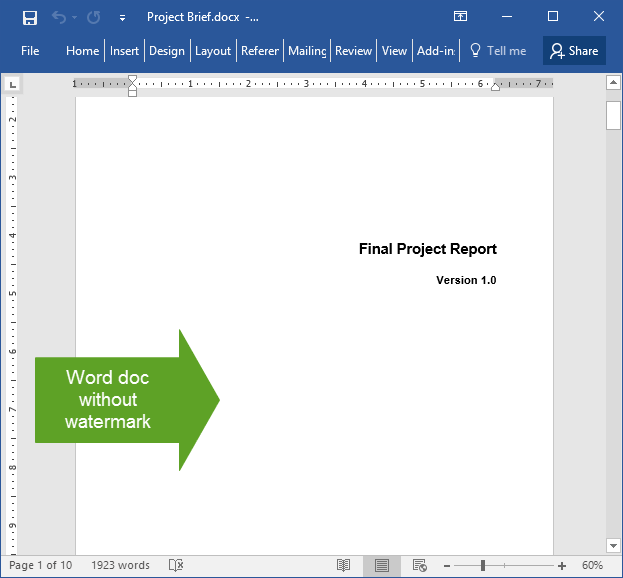
Here is a preview of the word document before PDF conversion:
The PDF with the image watermarked in the middle of all pages, as can be seen below:
Text as watermark
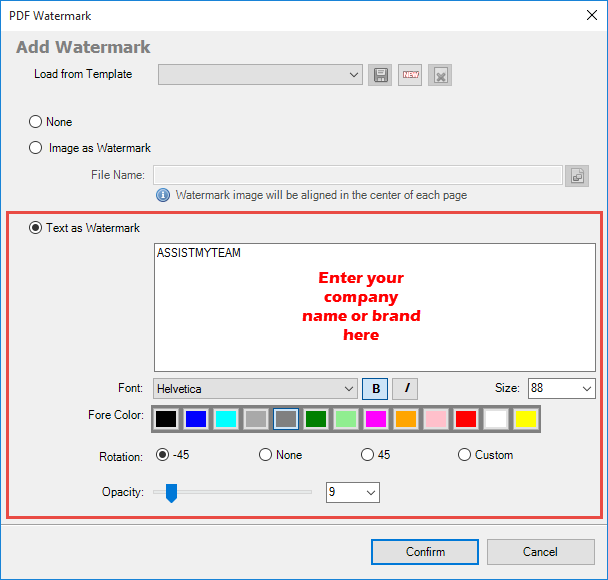
Click on the ‘Text as watermark‘ radio option. Likewise, type in your text (such as your company name, product name or brand etc). Customize the Font, Size, and Color of your text watermark. Similarly, you can adjust the opacity of the watermark to allow text from behind to show through. Moreover, you can also adjust the angle and rotation at which you want the watermark.
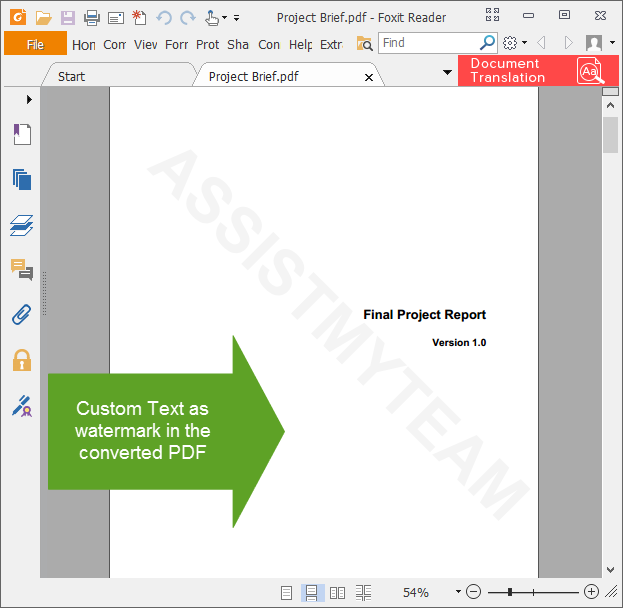
The PDF file with the custom watermarked text (e.g., company name embossed in each of the page) as can be seen here:
Password protect PDF and restrict permissions
A PDF file on its own is not as secure as you may think. Surprisingly, with PDF Converter, you can lock down your PDF content by setting password encryption and limited file permissions. To point out, this is available when you press the ‘Convert to PDF (Advanced)‘ from the context menu in Windows Explorer. And click the ‘Security‘ button in the advanced mode panel.
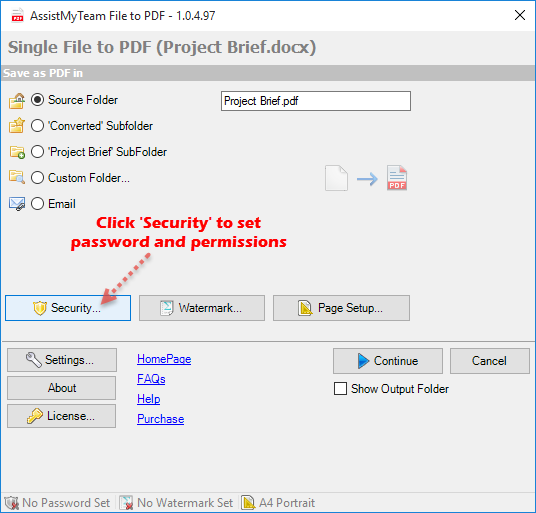
The security panel option shows up and has two sections – Document Open and Permissions.
PDF Document Open
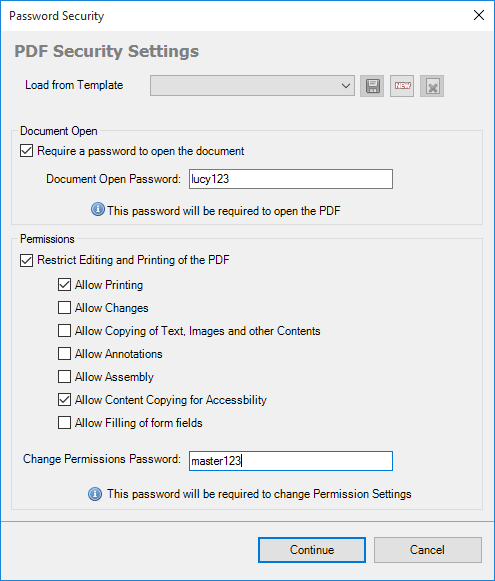
To begin with, check the option ‘Require a password to open the document‘ to set a password that will be required by your intended recipients for opening and viewing your PDF content. And type the password in the box. In fact, this is the simplest way to filter out your intended recipients from malicious users.

PDF Permissions
Additionally, check the option ‘Restrict Editing and printing of PDF‘ under Permissions section, to add another level of security to your PDF content should your file be accidentally accessed. While people may be able to view it, ensure that viewing is all they can do with it. For instance, you can restrict activities from printing content to copying text. Moreover, a master password can also be set that will be required to perform unrestricted activities on the PDF material.
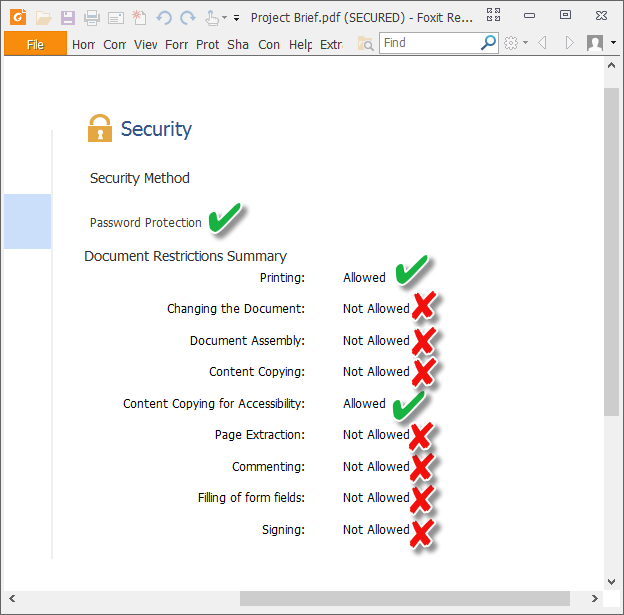
Checking the PDF’s Properties > Security dialog in any PDF viewer, users can see what permissions are given to the file, if any.