

Part-I: Managerial Installation and Configuration
The managerial installation consists of an add-in with which you can configure a SQL database as well as maintain the settings of the helpdesk. It has to be performed by the administrator before the agent tools are installed on every technician’s system.
The Manager setup is of two different types – one each for 32-bit Outlook and 64-bit Outlook
For Per User Installation:
AssistMyTeamHelpdeskManagerSetup_x86.exe (for 32-bit Outlook)
AssistMyTeamHelpdeskManagerSetup_x64.exe (for 64-bit Outlook)
For Per Machine Installation:
AssistMyTeamHelpdeskManagerSetup_x86_Citrix.exe (for 32-bit Outlook)
AssistMyTeamHelpdeskManagerSetup_x64_Citrix.exe (for 64-bit Outlook)
Step 1. Run the AssistMyTeamHelpdeskManagerSetup_xXX.exe to start the installation. Click ‘Next’ to Continue. If Outlook 2010 or later is not installed, the setup wizard will not be able to proceed. Please also ensure Outlook is shutdown (if already running or active in the task manager) as the setup has to install an Outlook add-in.
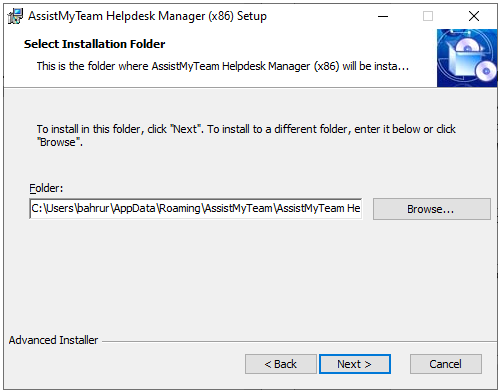
Step 2. Select the appropriate destination folder where the application files will be installed. If you change the default folder path, please make sure you have appropriate permission. (Note: by default, it will be installed under your application data folder)
Step 3. Click ‘Next’ to continue with the files extraction. It just takes a few minutes to complete the whole copying process
Step 4. Click ‘Finish’. This ends the files installation process in your system.
Step 5. Start Outlook (restart if it was already running during the files installation). As soon as Outlook is loaded, you will be prompted with the following database connection dialog box:
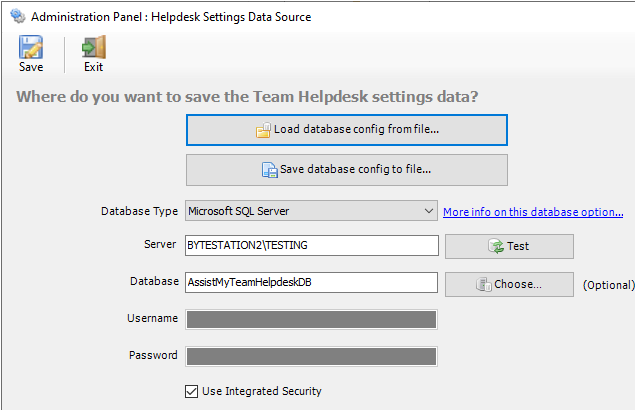
Now, the final step is to choose a database where all the settings, templates, cases, articles and other helpdesk data will be saved. Supported database options are: Microsoft SQL Server (default) and Microsoft Azure SQL.
Using Microsoft SQL Server
This is the default recommended database. SQL Server Express edition is also supported. You need to provide the Server name as it is mandatory. The Database name is optional. If it is left empty, a new database with the name ‘AssistMyTeamHelpdeskDB’ would be created. If your SQL server is configured to use windows authentication (NTLM), then you can check the ‘Use Integrity Security’ option to let Windows manager the credentials to access the resources on the SQL server.
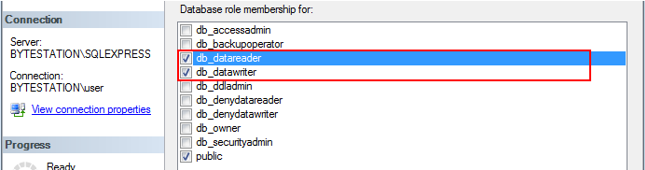
Permission for Technicians/Agents on the SQL database
Each of your helpdesk users/technicians should have both db_datareader and db_datawriter permission on the Helpdesk SQL database.
NOTE: When choosing a SQL server database for Helpdesk System, if you are not using the ‘Integrated Security’ (also known as Windows Authentication, or NTLM authentication), then it is very important that each user or agent has knowledge about their SQL username and password so that they can enter them while making the first-time connection with the helpdesk database with their installed helpdesk add-in in Outlook.
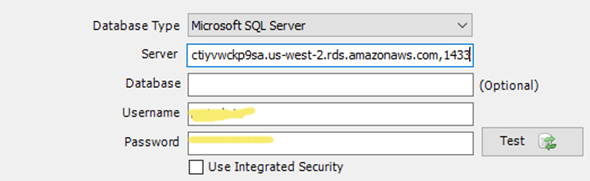
Using Cloud based SQL Server database
You can also use cloud-based SQL server service instead of on-premise such as Amazon RDS cloud service (They offer both free and paid accounts. For more, refer to https://aws.amazon.com/rds/). For instance, below is our test MS SQL account with Amazon RDS. Once you have signed up and created a MS SQL database, input the endpoint URL as server in our app. Make sure, you suffix the port number after the endpoint as “,1433” so that the full URL in the server name would be ‘XXXXXXXXXXXXXXXXXXXXXXXXX.rds.amazon.com,1433’.
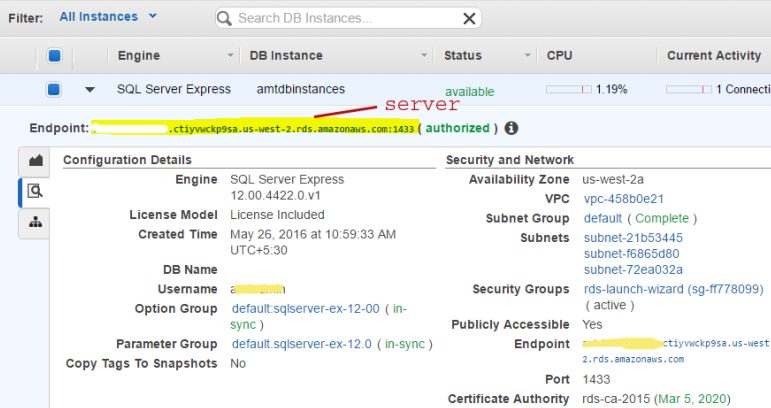
And here is screenshot of the RDS server to use from the RDS member panel.
Using Microsoft Azure SQL
Azure SQL Database is a cloud-based relational database service from Microsoft, which is based on SQL Server database. This option is ideal for helpdesk that have technicians scattered or working remotely in different locations but have access to the web.
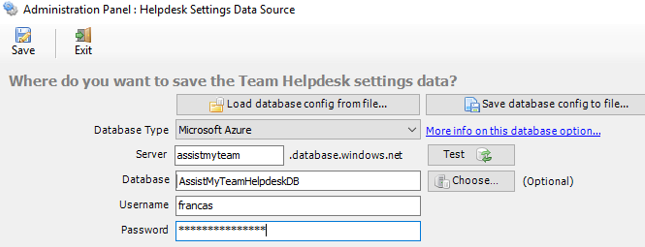
NOTE: If no database name is mentioned, the helpdesk add-in will create a new database in your Azure SQL server, by the name of ‘AssistMyTeamHelpdeskDB’.
Step 6. Once the chosen database is created, you will be prompted with an option to customize the starting ID of the cases and KB articles. By default, the case and KB article will start from 1. However, you can change that to something higher, say 10001. You can type in your starting figure for cases and KB articles as shown below:
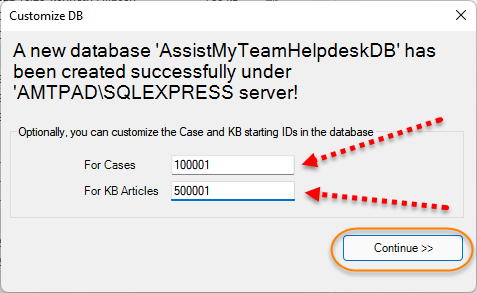
And press ‘Continue >>’.
NOTE: In situation where you didn’t customize the starting figures from the default 1, don’t worry, you can customize it later on manually using the steps as described in this KB article – How to configure the case ID to start from 10000?
Step 7. With the database creation and configuration done, you will be given a choice to load a sample dataset of cases, KB articles and drop-down lists (problems, statuses, callers, agents etc.). We strongly feel you will be able to learn and get familiar with the helpdesk add-in very quickly with the sample dataset and hence, we recommend that you load them. If chosen, 5 each of cases, KB articles, callers, drop-down lists etc. will be loaded into your new database. You can, of course, remove them later without much difficulty.
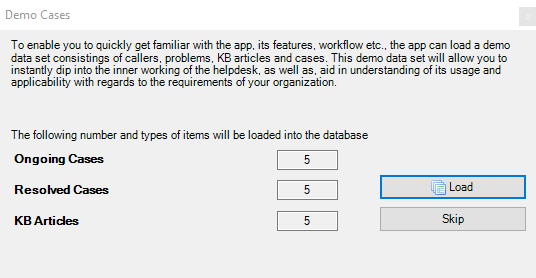
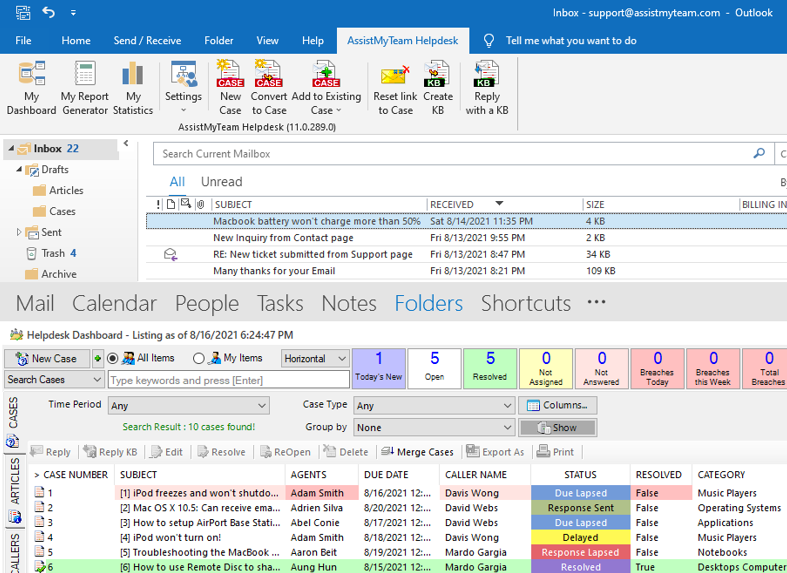
Once done, you are almost ready. If you start Outlook and open the helpdesk dashboard, you would see the cases and articles that were loaded for demonstration starts from your specified starting figure. i.e., 100001.

If you want to work on the cases in your Outlook, you and other agents will also need to install the helpdesk agent add-in as well.
Part-II: Agent Addin Installation and Configuration
This install is meant for agents and technicians who would be working on support cases from within their Outlook. Before you install the agent tool, make sure the helpdesk SQL database had been already created and configured by your manager, and that you know the database name, your credentials to the SQL server if Windows authentication is not configured (ask your helpdesk manager). This is required because when you start Outlook after installing the Agent add-in, you will be asked to enter the SQL server logon information as well as the database name (if different from the default name ‘AssistMyTeamHelpdeskDB’).
The Agent setup is of two different types – one each for 32-bit Outlook and 64-bit Outlook:
Per User Installation
AssistMyTeamHelpdeskAgentSetup_x86.exe (for 32-bit Outlook)
AssistMyTeamHelpdeskAgentSetup_x64.exe (for 64-bit Outlook)
Per Machine Installation
AssistMyTeamHelpdeskAgentSetup_x86_Citrix.exe (for 32-bit Outlook)
AssistMyTeamHelpdeskAgentSetup_x64_Citrix.exe (for 64-bit Outlook)
The Agent installation mainly consists of an Outlook add-in that has all the logic and functionalities of the helpdesk application. It needs to be installed by all agents/technicians who will be working with the Team Helpdesk in Outlook. Before you continue the installation, it is recommended that Microsoft Outlook is shutdown (if active).
(Note: if the administrator/manager needs to work on support cases, the agent tool also needs to be installed. It is perfectly normal to have both Manager and Agent add-ins installed on the same machine. However, for normal technicians, just the agent add-in is enough to work with the support cases in Outlook).
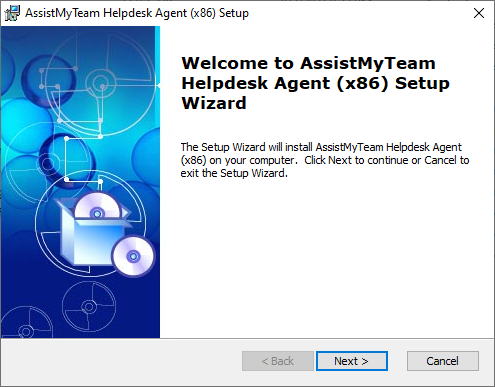
Step 1. Run AssistMyTeamHelpdeskAgentSetup_xXX.exe to start the installation. Click ‘Next’ to Continue. If Outlook 2010 or later is not installed, the setup wizard will not be able to proceed.
Step 2. Select the appropriate destination folder where the application files will be installed. If you change the default folder path, please make sure you have appropriate permission. (Note: by default, it will be installed under your application data folder).

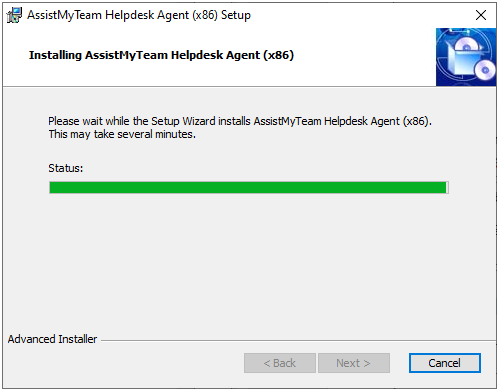
Step 3. Click ‘Install’ to continue the files extraction.

Step 4. It may take a few minutes to complete the whole copying and registration process.
Step 5. Click ‘Finish’ to end the installation wizard.

Now start Microsoft Outlook. If the agent add-in installation was successful, you will see a new menu item ‘AssistMyTeam Helpdesk’ in Outlook (after help menu).
Step 6. The final step of the Agent add-in installation is linking up your Helpdesk Agent add-in with a configured SQL Server database. When you start Outlook, you will be prompted to enter the SQL Server details so that the add-in can link up with the existing helpdesk database.
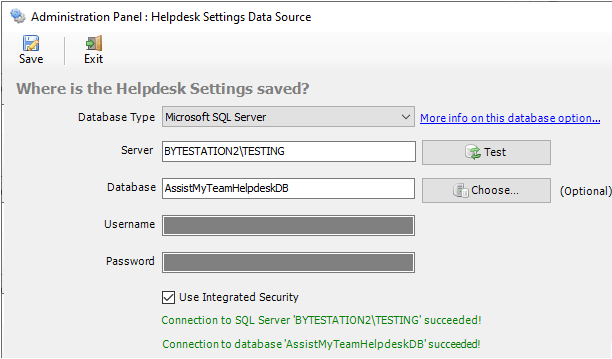
Once you feed your credentials into the SQL Server or Azure Cloud, click ‘Save’ button. Consequently, the agent add-in will be connected to the helpdesk database, enabling you to raise new cases from emails, or view them in the dashboard panel.
Additional step for Technicians/Agents on the SQL database.
Make sure that you have adequate permission to access and update the tables in that database i.e., db_datareader and db_datawriter permission on the AssistMyTeam Helpdesk SQL database.

The installation folder in your primary drive depends on the installation type you had chosen – Per User or Per Machine.
For 'Per User Installation', it would be
C:\Users\[USER]\AppData\Roaming\AssistMyTeam\AssistMyTeam Helpdesk Agent (x64 or x86)
For 'Per Machine Installation', it would be
 C:\Program files (x86)\AssistMyTeam\AssistMyTeam Helpdesk Agent (x86 or x64)
NOTE: PDF versions of these installation guides are available for download below: