What is Ticket ‘Rejection’ workflow?
If a ticket serves no purpose or is no longer relevant to the helpdesk or out of context of the suppport, you can either delete it permanently or, tag it as ‘Rejected’ and keep it in the system which can then be accepted at later stage if required. When a ticket is marked rejected, Issue Tracker add-in can send out an auto-alert informing the caller why it was rejected.
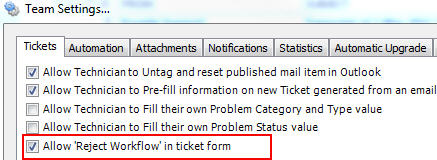
By default, Ticket Rejection workflow is disabled. You can enable it from Team Settings > Tickets tab > ‘Allow Reject Workflow in ticket form’.
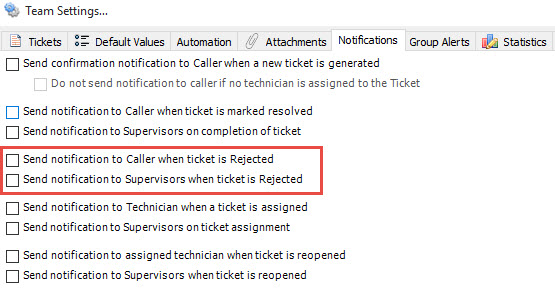
You can control if the auto alert about rejected ticket is send to the caller from Team Settings > Notifications tab > ‘Send Notification to Caller when ticket is rejected’. Another alert to supervisors on rejected ticket can also be sent.
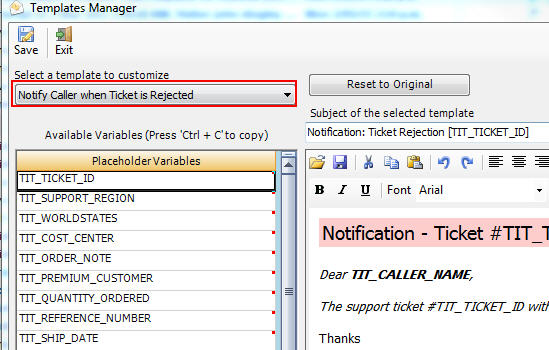
The email template for this auto alert is available under Admin add-in > Team Settings > Templates Manager for customization.
If reject workflow is enabled, when you select or open an email that is part of a ticket (by the presence of a ticket ID in subject), you will find ‘Reject’ button under ‘Edit Ticket’ menu in Issue Tracker toolbar to make it easier to disqualify or reject a ticket without opening the ticket form in Outlook from SharePoint and rejecting it.
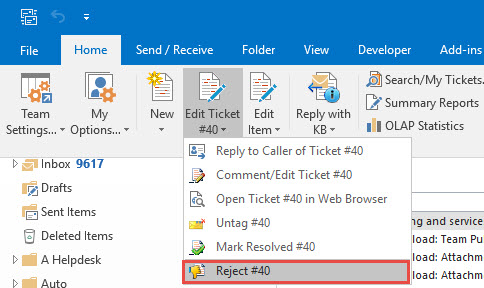
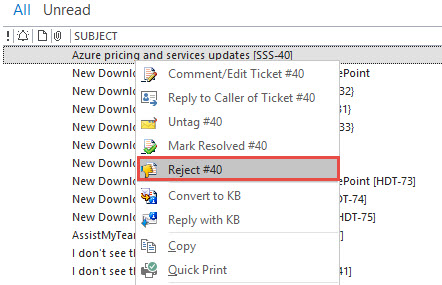
Or, you can right-click the email and press ‘Reject’ button.
A prompt dialog box allows you to choose if to send the auto notification to the caller and if so, you can also choose to customize the notification (say, if you need to add some further information for the caller as to why the support request was rejected).
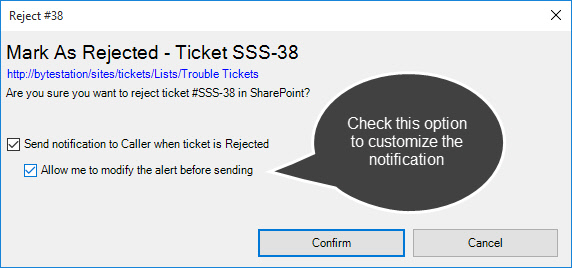
If the ‘Allow me to modify the alert before sending’ option is enabled, you will be able to customize the notification or add additional information, attachments etc, before you can send it to the caller.
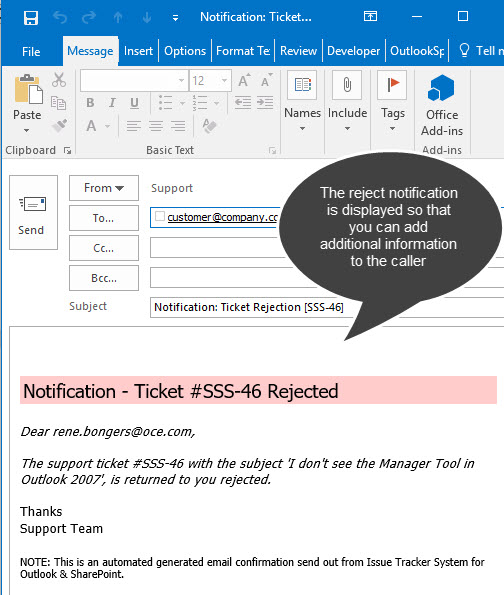
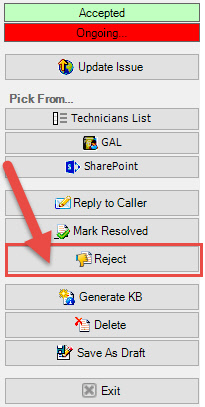
When you open a ticket in its form in Outlook, you will also find the ‘Reject’ button – to disqualify an ongoing ticket. You will be prompted if you want to send the auto-notification to the caller, and optionally, if you want to customize the email before sending (may be to provide some additional information to the caller on why it was rejected).
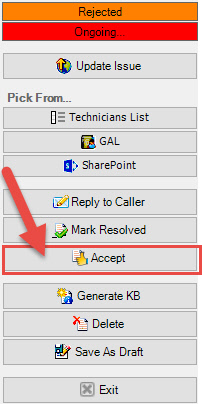
If you open a rejected ticket in its form in Outlook, there is a ‘Accept’ button – which you can use to qualify a rejected ticket. By default, new ongoing cases are qualified.