
Default ordering of emails in the PDF
When you combine multiple emails into a single merged PDF document (as PDF Pages), the PDF add-in will follow the selection hierarchy of your emails in Outlook and that will be reflected in the final, merged PDF document too. For instance, the first one you select will appear in at the start of the PDF document, and the second email after the first, and so on. And the last email in the selection will appear at the end of the PDF document.
Chronological ordering of emails in the PDF
However, if the order or placement of the individual email within the PDF document is of importance, or if you want to alter or re-order the sequence, you can use the advanced combine mode options as shown below:
Steps to customize the ordering of emails in the PDF document
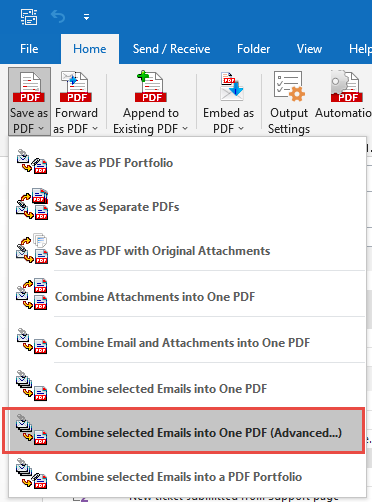
1. In your Inbox folder, select multiple emails. And from Outlook > PDF toolbar > Save As PDF menu, choose the menu option ‘Combine Selected Emails into One PDF (Advanced…)’.
2. You will be prompted with a ‘Save As’ dialog box. Select the target folder and enter the name of the PDF file that will created eventually.
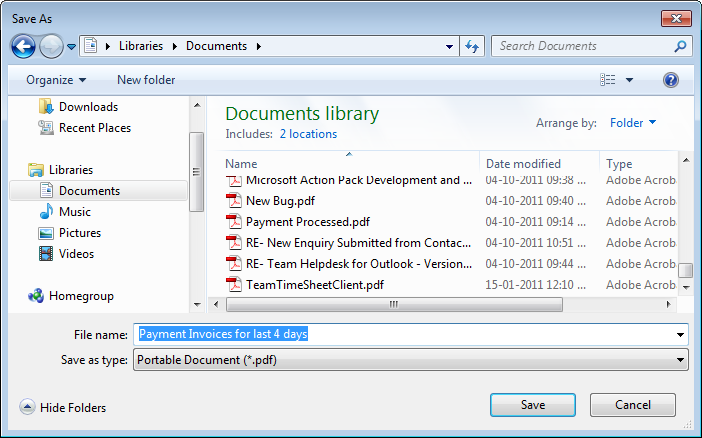
3. Click ‘Save‘,.
4. Now, you will be prompted with the customize sequence dialog box. Here, you can change or sort the order or sequence of the emails in the way you want them to appear in the PDF document.

Use the up and down arrow buttons to change the sequence or, you can also drag and drop files using your mouse in the order you want. You can also click the column header such as the ‘Received Time’ to sort the emails in chronological order, just the way you would like them to appear in the final PDF document after merging. Additionally, if you have some unwanted emails that you don’t want in the PDF document, you can simply un-check them for exclusion. You can further overwrite the default watermark, security, page layout or orientation for this particular action only.
5. A progress dialog box might appear at the extreme right corner of your screen with the status of the processing. Finally, when it is finished, the PDF file is saved in the chosen output folder.
And this is how the final one PDF document looks like after merging in PDF reader software.
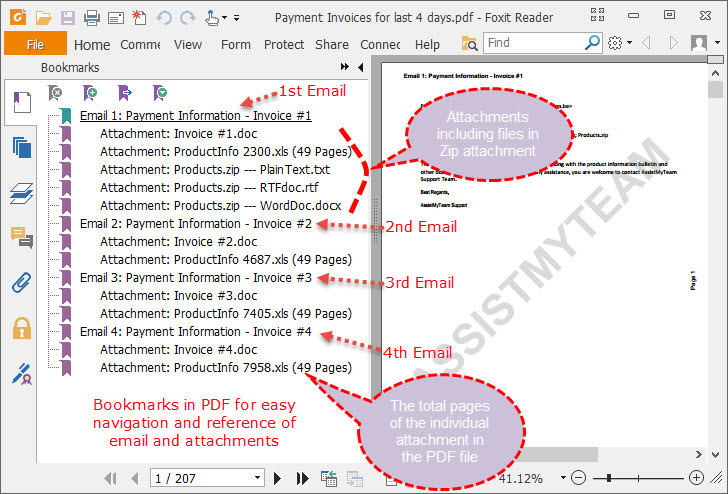
Table of Contents and Bookmarks
If you open the resultant PDF file, you will notice that the add-in automatically adds bookmarks of the emails as well as number of pages each email occupy (within brakets), in the PDF document. Notably, each bookmark points to the first page of the emails and attachments. This enables for easy navigation and references of the email within the PDF document.