Adding a watermark of your company logo on publication material not only adds a professional touch but also helps to identify ownership without completely locking the PDF down. More importantly, watermarking each page of your PDF helps protect your intellectual property from being passed off as someone else’s work when it is shared with others.
In AssistMyTeam Email to PDF add-in, to add a watermark image or text annotation to your PDF files, you will need to create a profile under Outlook > Email to PDF toolbar > Output Settings > Watermark tab.
Click the ‘New’ button to create a watermark profile. You’ll get the following dialog box where you can choose the type, position of your watermark. Click on the ‘Image as watermark’ radio option. To insert an existing image as a watermark, click on the Image button located at the extreme right corner and browse the open dialog box and select your image from your computer. You can see the preview of the selected image on the right side.

You can adjust the opacity of the image in relative to the background of the PDF document. We recommend an opacity of 25-30% for better legibility.
And this is what the converted PDF file looks like (in PDF reader software) – with the image embedded in the middle of each page of the PDF.

NOTE:
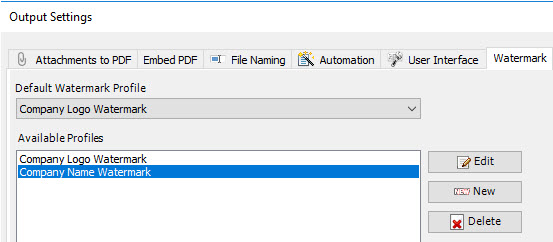
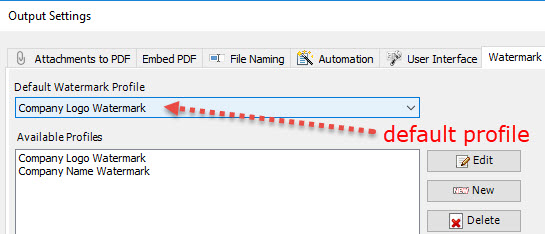
It is possible to define multiple watermark profiles. However, you will have to choose only one default profile that would be applied to the PDF generated by the add-in in Outlook. And you do that from the drop-down field.
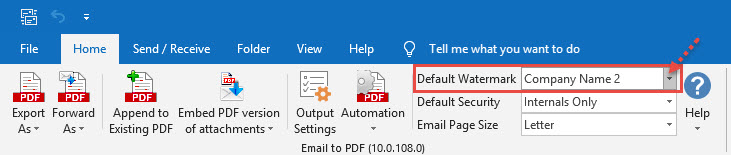
Or, even simpler, you can choose or switch to the desired watermark profile from the PDF toolbar in your Outlook.