We have multiple mailboxes and we raise new tickets from emails received in these multiple mailboxes. How can we set Issue Tracker add-in to send out the notification alerts and replies from the recipient mailbox account from which the ticket was raised?
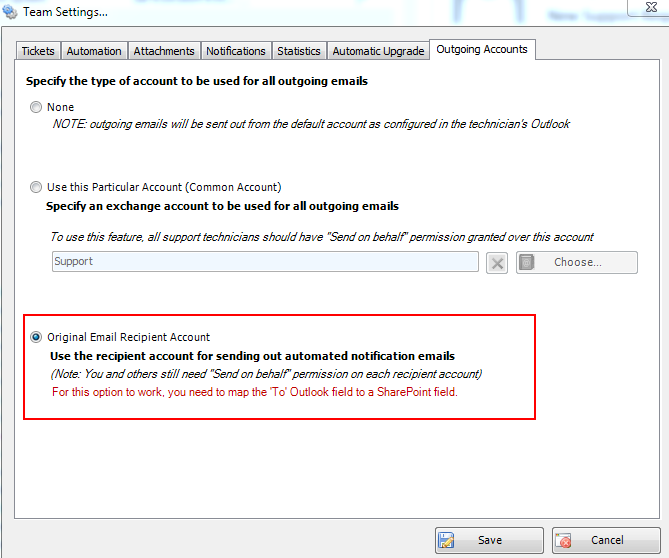
Assuming you have 3 mailboxes – Sales, Support and Marketing. And you raise tickets from emails received in these 3 mailboxes in your Outlook. By default, all the auto alerts and replies to existing tickets (to the callers) would be sent out from the default mailbox account (your primary account in your Outlook profile). However, if you want Issue Tracker to use the respective recipient mailbox account from which the auto-alerts and replies would be sent out from, you need to choose the 3rd the option ‘Original Email Recipient Account’ from the ‘Specify the type of account to be used for all outgoing emails’ section (Outlook > Issue Tracker toolbar > Team Settings > Advanced Options > Outgoing Accounts tab). Refer to the screenshot below.

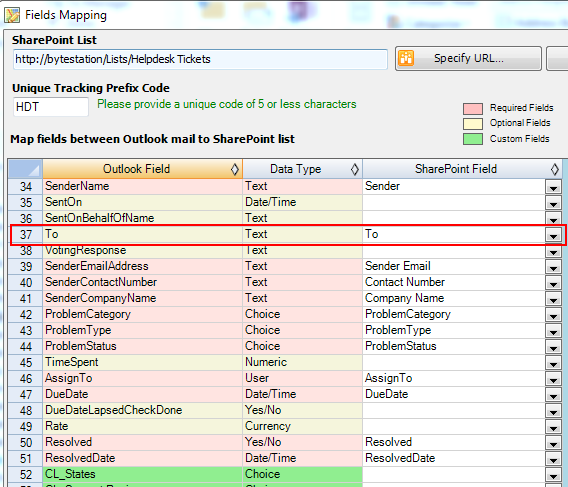
Please note that, when this option is enabled, this feature of sending out the auto alerts and emails from the respective mailbox account would only work if you had mapped the Outlook ‘To’ Field in each of the linked/configured SharePoint Ticket Lists. (Outlook > Issue Tracker toolbar > Team Settings > Configure SharePoint Ticket Lists). Please note that, you and other technicians need to have ‘Send Behalf of’ (‘Send As’) permission over the mailboxes for Issue Tracker add-in to successfully send out auto-alerts and replies.

NOTE: If you choose the last option ‘Original email recipient account’, and you just mapped the ‘Mail – To’ Outlook field to SharePoint field in every mapping of linked SharePoint lists now, then only tickets that you raise now will work with this setting. Existing tickets that do not have the ‘To’ field populated will not work.
Lastly, if you want to use a global (common account) from which all auto alerts and replies should be sent from (irrespective of the multiple mailboxes you have), you could choose the 2nd option ‘Use this particular Account (Common Account)’
