
Setting up a SQL Server Express for use with AssistMyTeam Collaboration Apps
AssistMyTeam Collaboration Apps such as Team Helpdesk, Team CRM, Team TimeSheet etc. requires a dedicated network database to store settings and configurations data in one central location, accessible to all team members. Supported database options are Microsoft Access (placed on a shared network drive), Microsoft SQL Server (on-premise or cloud). Using Access database (MDB file) on a network folder is the simplest, but is limited to 10-20 concurrent users. Moreover, access database with simultaneous read/write from multiple users often leads to corruption making this option unreliable. A SQL server database option offers a robust platform for storing data on network and support any number of concurrent users. If your organization can’t afford a full fledged enterprise MS SQL server database, you can opt for the free EXPRESS edition which is limited only by database size (upto 10 GB and 1 GB RAM memory). For most organizations, a SQL Express edition should be sufficient enough to be used with our Collaboration Apps.
MS SQL Express edition is available in different versions. Download and install of your choice from below:
- SQL Express 2008 – https://www.microsoft.com/en-in/download/details.aspx?id=1695
- SQL Express 2012 – https://www.microsoft.com/en-in/download/details.aspx?id=29062
- SQL Express 2014 – https://www.microsoft.com/en-in/download/details.aspx?id=42299
- SQL Express 2016 – https://www.microsoft.com/en-in/server-cloud/products/sql-server-editions/sql-server-express.aspx
STEPS – INSTALLATION:
In this article, we will try out installation of a SQL server 2008 EXPRESS edition (FREE) on a Windows Server 2008 R2 and allow it for network access.
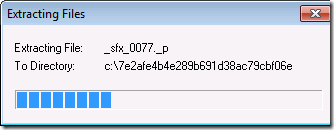
1. Launch the package, you will then see the contents extracted to a temporary location.
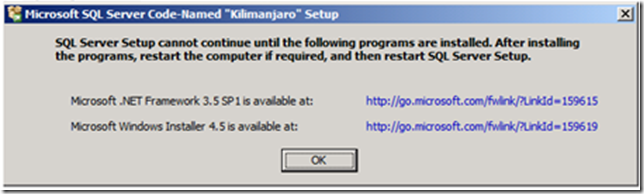
2. SQL Server Setup checks to determine pre-requisites are installed. If not, you will be prompted to install.
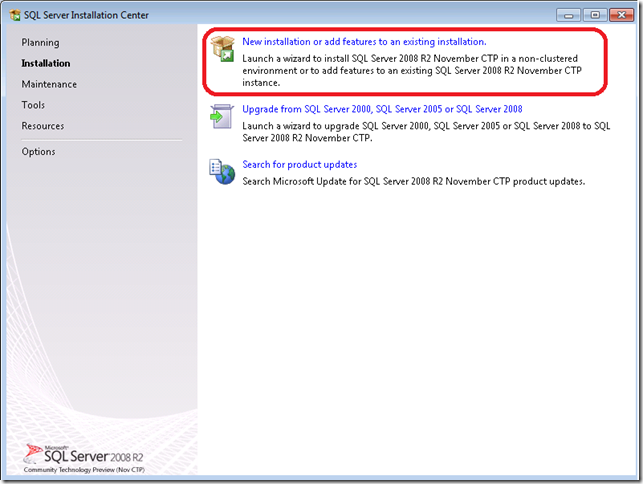
3. The Installation Center will then launch. Click on “New installation or add feature to an existing installation” to start the Installation Wizard.
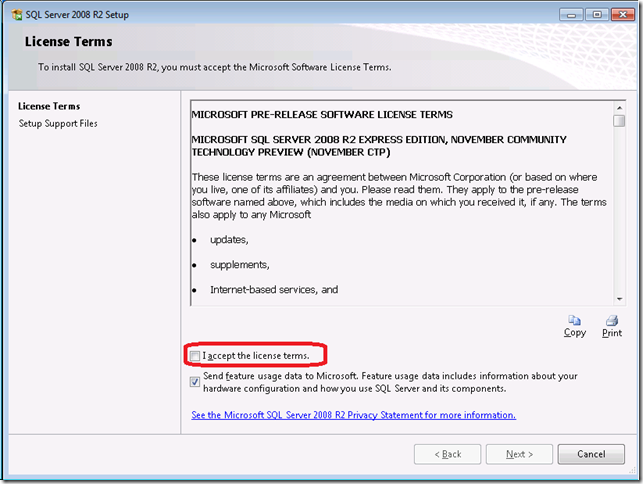
4. Accept the license terms.
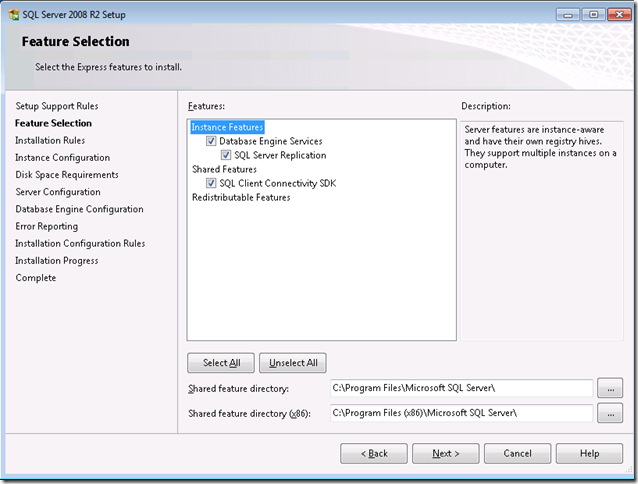
5. Review the features to installed and where SQL Server will be installed. Make any changes that are necessary for your environment.
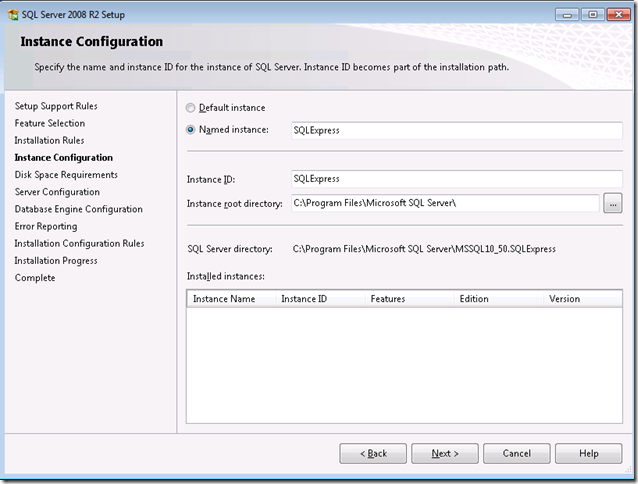
6. Review the Instance Name and change if necessary.
7. Review the credentials that will be used for the services that will be created.
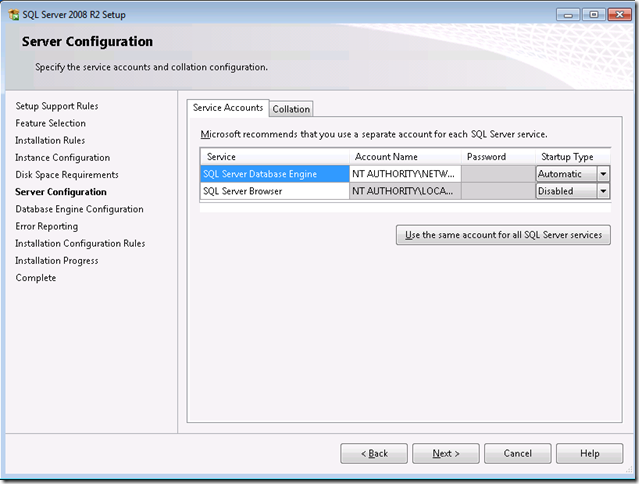
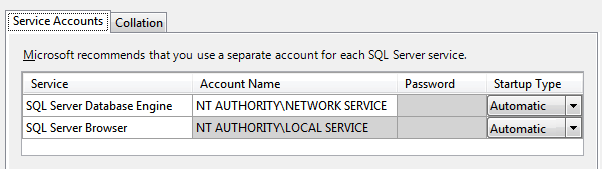
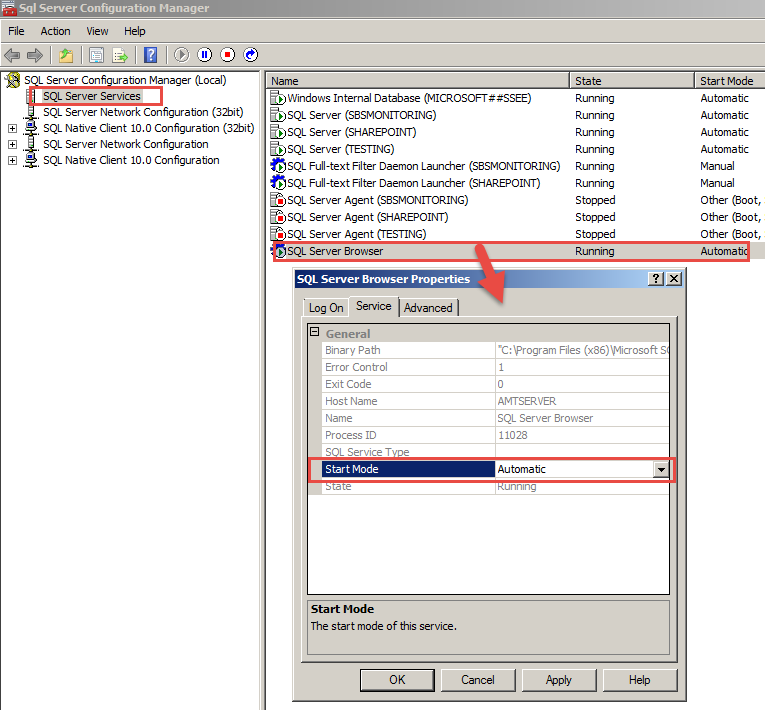
IMPORTANT: The Account Name of the ‘SQL Server Database Engine’ should be set to ‘NT Authority\NETWORK SERVICE’. You also need to set both the ‘SQL Server Database Engine’ and ‘SQL Server Browser’ to ‘Automatic’ in the ‘Startup Type’ (last column).
8. Review the Authentication Mode and the administrators that will be added to the Database Engine.
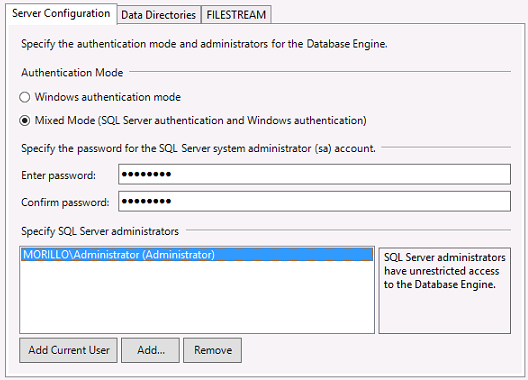
NOTE: We recommend that you use a ‘Mixed Mode’ authentication mode.
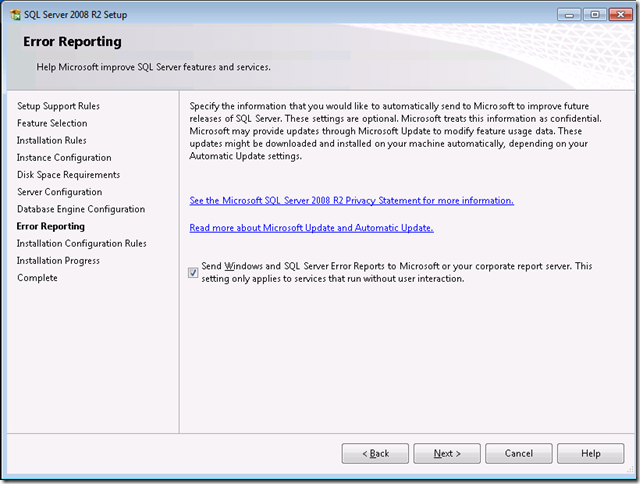
9. Review the Error Reporting settings.
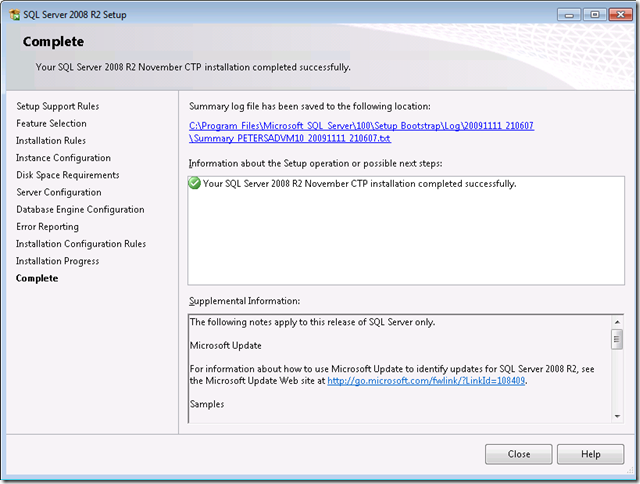
10. That’s it!
Now, install the SQL Server Management Studio (SSMS) app from Microsoft of your choice from:
- SQL Server Management Studio 2008 Express – https://www.microsoft.com/en-in/download/details.aspx?id=7593
- SQL Server Management Studio 2012 Express – https://www.microsoft.com/en-in/download/details.aspx?id=29062
(choose ENU\x86\SQLManagementStudio_x86_ENU.exe or ENU\x64\SQLManagementStudio_x64_ENU.exe depending on the bitness of your system) - SQL Server Management Studio 2014 Express – https://www.microsoft.com/en-in/download/details.aspx?id=42299
(choose SQLManagementStudio_x86_ENU.exe or SQLManagementStudio_x64_ENU.exe depending on the bitness of your system) - SQL Server Management Studio 2016 Express – https://msdn.microsoft.com/en-in/library/mt238290.aspx
NOTE: SQL Server Management Studio (SSMS) is a software application used for configuring, managing, and administering all components within Microsoft SQL Server. You can install it on the server as well as on your personal workstation from which you can manage the SQL server database.
Before connecting SQL server express with our collaboration apps, make sure you have this SQL Server management studio installed on your workstation and can connect to the SQL server instance located on the server.
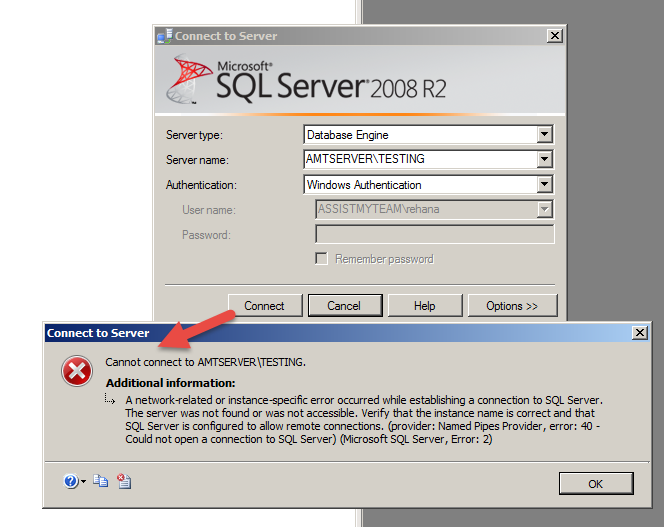
If you can’t access the SQL server instance from your workstation, most likely the SQL Server is not configured for Network Access (TCP/IP) or, the firewall on the server might be blocking access to requests from other systems.
SCREENSHOT BELOW: For instance, when trying to connect to the SQL Server instance (windows server) from the workstation (using SQL Server management studio or SSMS), a ‘connection failed’ error pop ups.
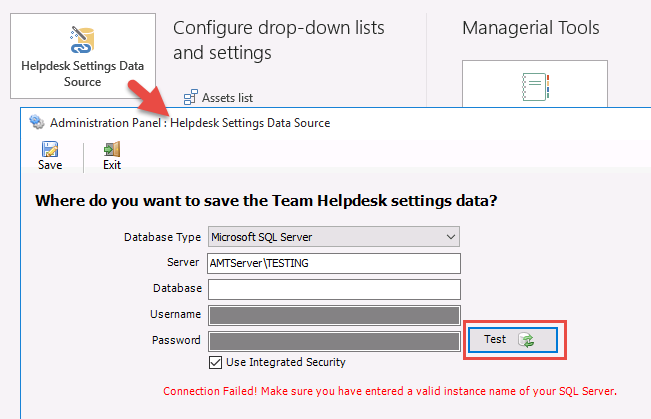
SCREENSHOT BELOW: For instance, when trying to configure and connect our ‘Team Helpdesk for Outlook’ app with a SQL server express instance on the network, a ‘connection failed’ error pop ups.
To fix this, follow the workarounds below:
Allow remote connections to this server
The first thing you want to check is if Remote Connections are enabled on your SQL Server database. In SQL Server 2008 you do this by opening SQL Server 2008 Management Studio, connect to the server in question, right click the server…
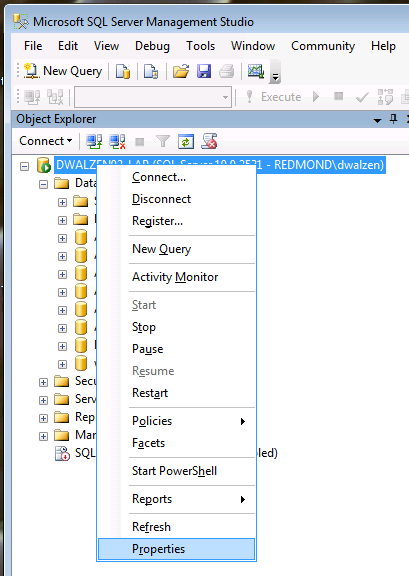
… and open the Server Properties.
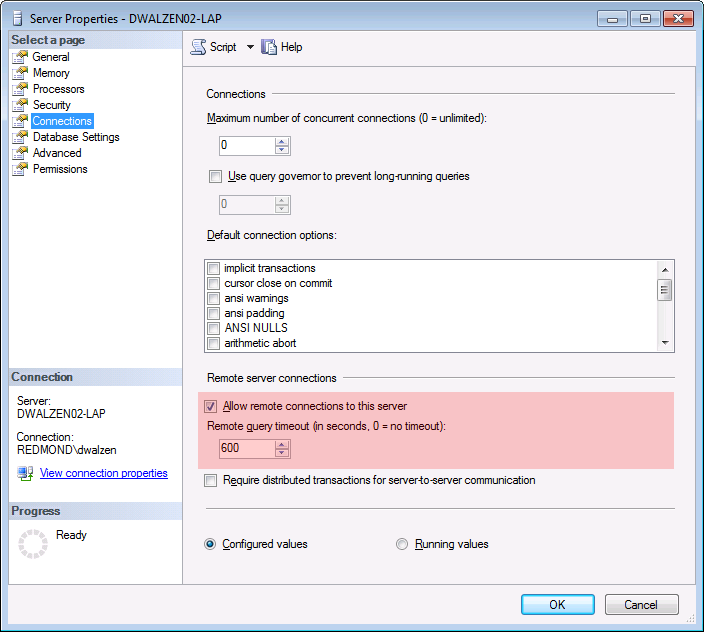
Navigate to Connections and ensure that Allow remote connections to this server is checked. Check if this solves the problem.
Protocols for MSSQLServer
If you’re still running in issues let’s dig a bit deeper. The next good thing to check is the SQL Server Network Configuration. Open the SQL Server Configuration Manager, unfold the node SQL Server Network Configuration and select Protocols for SQLEXPRESS (or whatever the name of your SQL Server instance is).

Make sure that TCP/IP is enabled and try again.
The Firewall (Server)
Firewall systems help prevent unauthorized access to computer resources. If a firewall is turned on but not correctly configured, attempts to connect to SQL Server might be blocked.
To access an instance of the SQL Server through a firewall, you must configure the firewall on the computer that is running SQL Server to allow access. The firewall is a component of Microsoft Windows. You can also install a firewall from another company. This topic discusses how to configure the Windows firewall, but the basic principles apply to other firewall programs.
To enable firewall settings on the windows server
- Click Start, click Control Panel, and then click ‘Windows Firewall’.
- From the navigation bar on the left, click ‘Allow a program or feature through Windows Firewall’.
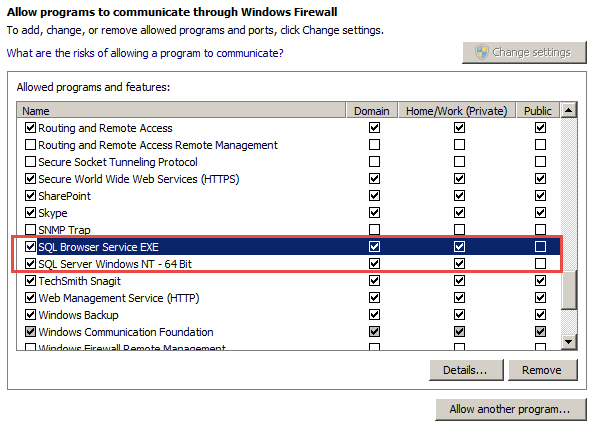
- On the ‘Allowed programs and features’, you will probably see that SQL Server is listed, but not selected as an exception. If you select the checkbox, Windows will open the 1433 port to let in TCP requests. Alternatively, if you do not see SQL Server listed, do the following:
- Click ‘Allow another program’.
- Click Browse.
- If you had installed a 32 bit SQL server, navigate to drive:/Program Files (x86)/Microsoft SQL Server/SQLEXPRESS\MSSQL\BINN. If you had installed 64 bit version, go to drive:/Program Files/Microsoft SQL Server/SQLEXPRESS\MSSQL\BINN (where drive: is the windows installation drive)
- Add the file sqlservr.exe to the list of exceptions.
Additionally, if no port option was specified with your SQL Server for remote connection, you also need to add ‘sqlbrowser.exe‘ in the allowed program in addition to ‘sqlserver.exe‘ in the firewall. Usually, The sqlbrowser.exe is located under C:\Program Files\Microsoft SQL Server\90\Shared\sqlbrowser.exe
You need to enable the ‘SQL Server Browser’ (disabled by default) from ‘SQL Server Configuration Manager’ so that the service ‘SQL Server Browser’ is running all the time (you can enable it to start automatically at startup from Control Panel > Administrative Tools > Services)
The Firewall (Workstation)
If there is still no communication happening between your computer and the remote SQL Server you most likely need to configure your firewall settings. A good first step is to figure out which port is being used by TCP/IP (and which you need to open in your firewall). You can do this by right clicking TCP/IP and selecting Properties.
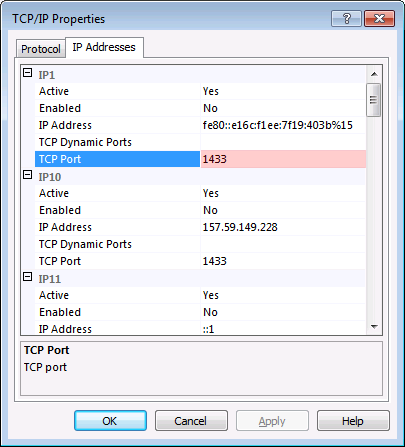
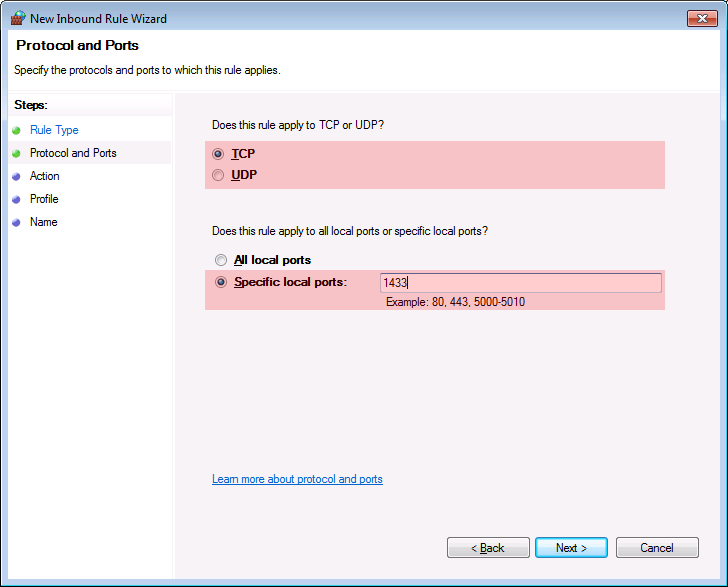
Click on the tab IP Addresses – Port 1433 it is  That was easy enough and all there is left to do is to allow inbound TCP/IP traffic on Port 1433 in your firewall. In Windows 7 this works something like this. Open the Control Panel and navigate to Windows Firewall.
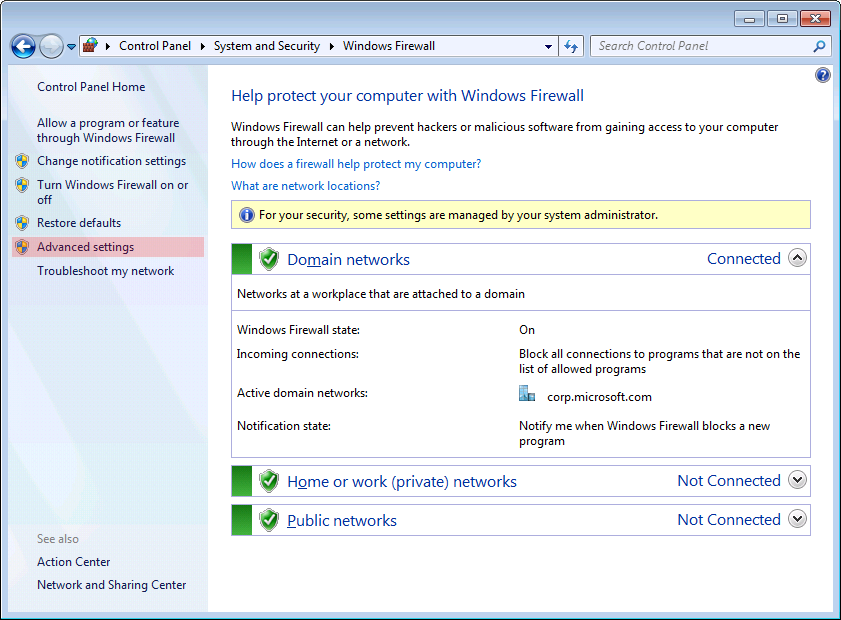
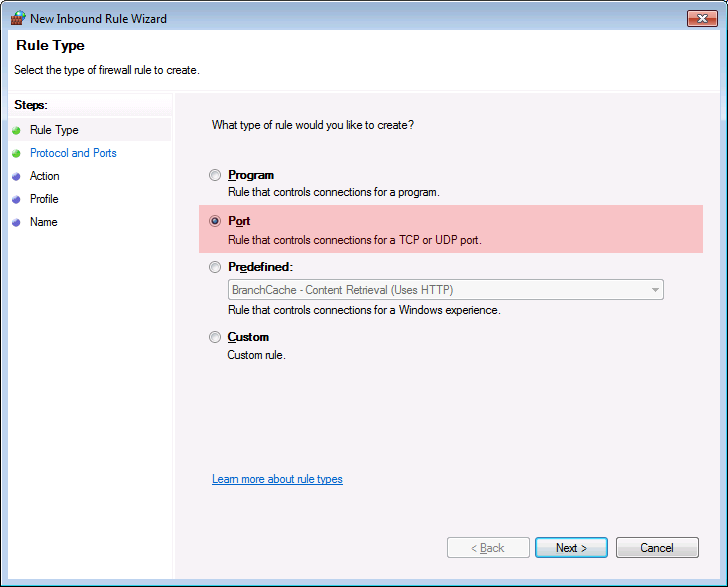
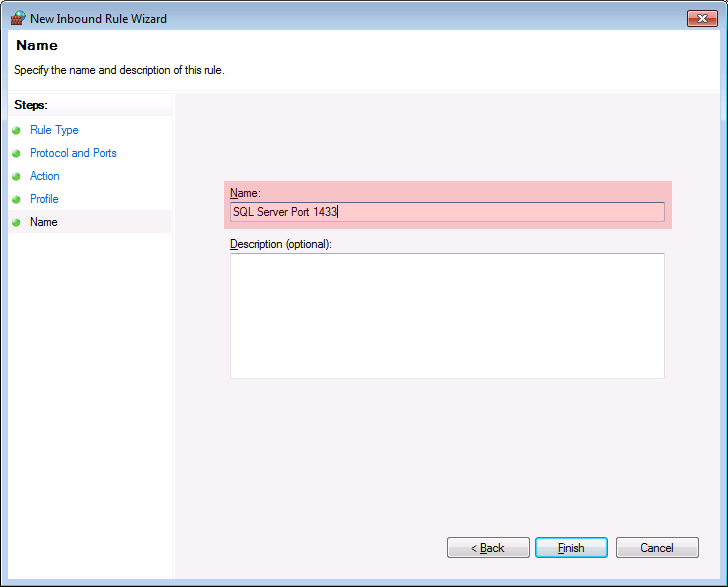
Click on Advanced Settings on the left hand side and you should see the Windows Firewall with Advanced Security. Select the Inboud Rules on the left hand side and click on New Rule… on the right hand side.
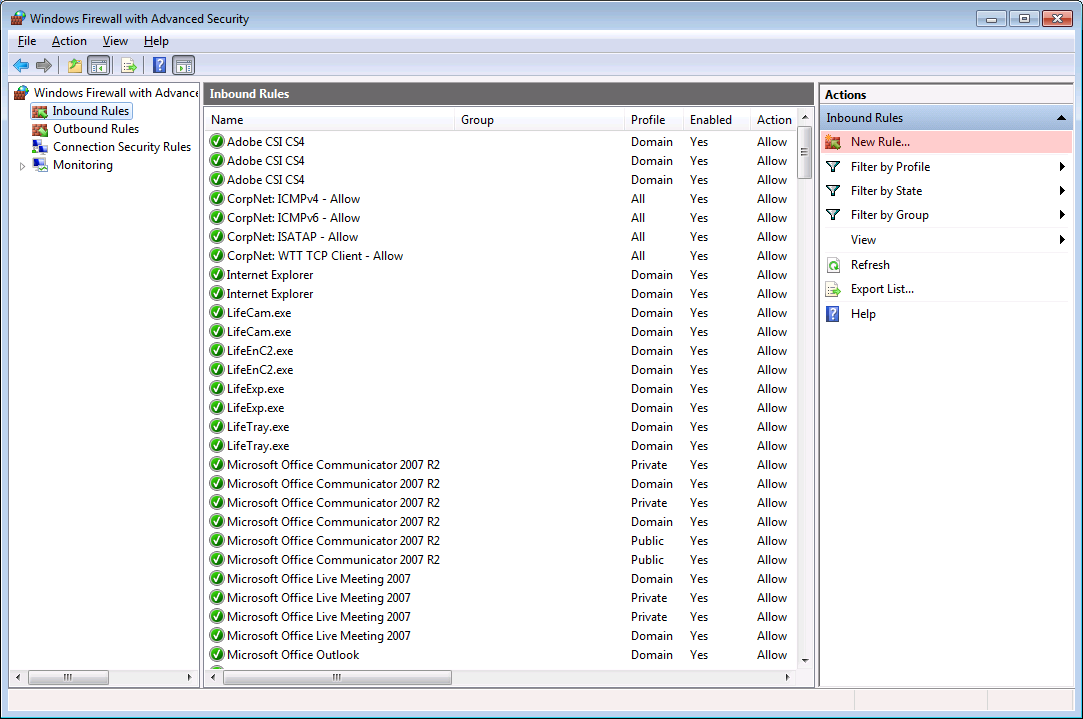
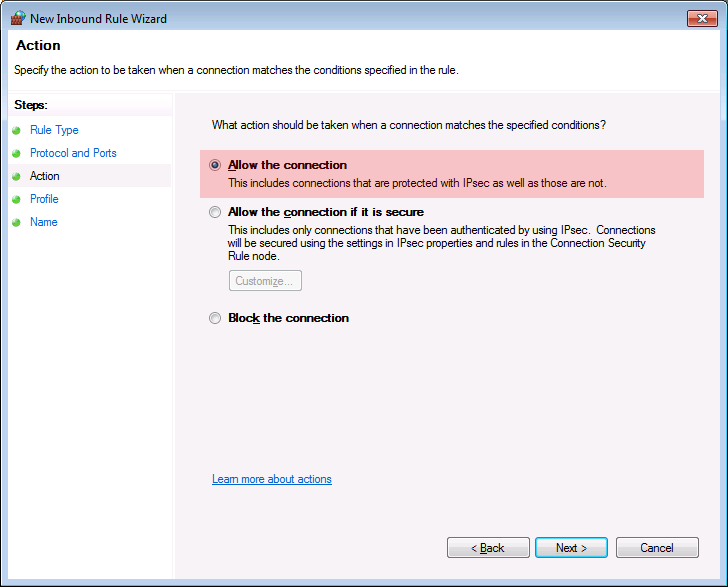
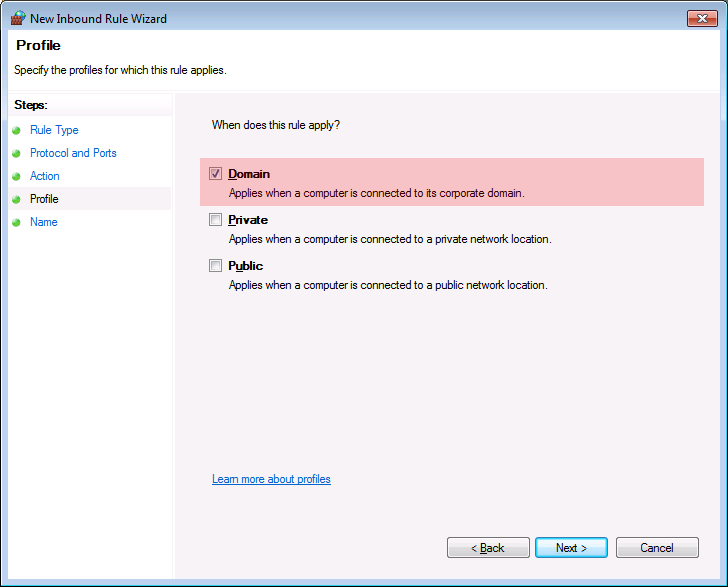
This opens the New Inbound Rule Wizard which you can use to allow inbound traffic on Port 1433 for TCP/IP (and which is exactly how you configured your SQL Server in the steps above). Just follow the steps outlined below and you should be good 🙂
If everything was set correctly (discussed above), the connection to the SQL server instance from our collaboration app should succeed.
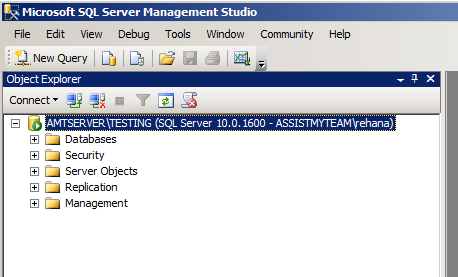
SCREENSHOT BELOW: For instance, when trying to connect to the SQL Server instance (windows server) from the workstation (using SQL Server management studio or SSMS), it should load successfully.
SCREENSHOT BELOW: For instance, when trying to configure and connect our ‘Team Helpdesk for Outlook’ app with a SQL server express instance on the network, a ‘connection succeeded’ confirmation pop ups.
